Fluid Bed Air Coffee Roaster
I reached some limitations with my severin popcorn based coffee roaster trying to roast bigger batches. I found that increasing the airflow was simple enough: prizing open the vents a little at the bottom of the chamber makes a big difference. Unfortunately increasing the heat was trickier: I put a metal bin over the top of he whole unit which caused the hot air to recirculate. After a bunch of successful roasts the fan gave out and melted.
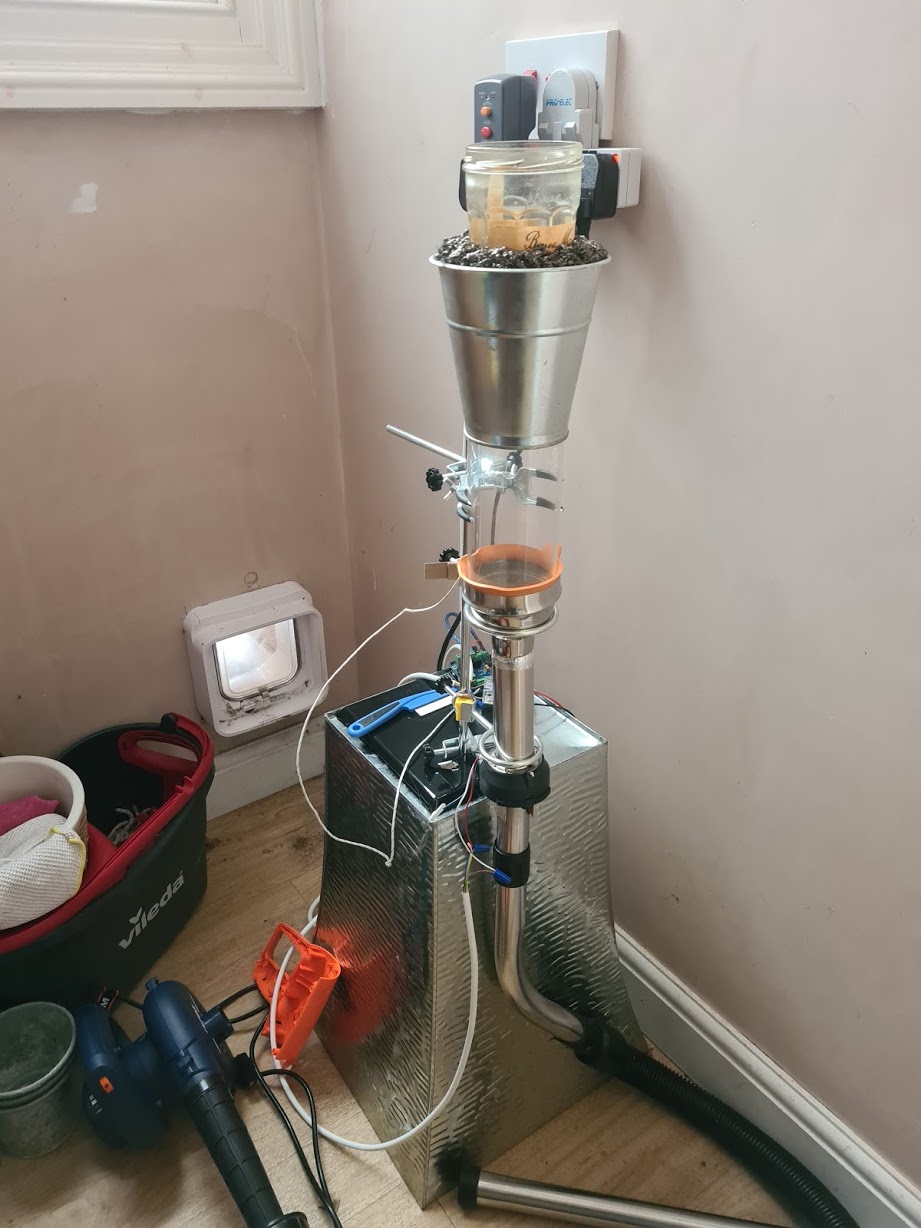
I’ve built a new roaster based on various ideas stolen from forum.homeroasters.org and some youtube videos. The design is basically along the lines of this fluid bed roaster, but everything is push-fit rather than welded. (more like jammed-together-fit).
Basically it’s a vacuum blower jammed into the back of a heatgun element to generate hot air flow. The roasting chamber is a glass candle chimney tube pushed into a cocktail shaker lid. The chaff collector is made from a tin plant pot and a stainless steel washing up scourer.
I thought I’d post some pictures and details because I’ve enjoyed looking at (and copying) pictures of other people’s coffee roaster builds.
Component list
The main bits are:
| component | price (uk) | from |
|---|---|---|
| Borosilicate glass candle chimney 75mm x 152mm | 16.00 | amazon |
| Von haus 2kw heat gun | 22.99 | amazon |
| ferm 400w dust blower | 29.99 | amazon |
| Metal mesh | 9.99 (I overpaid!) | amazon |
| hose pipe from old henry vacuum | maybe 10 quid to buy off ebay as spares | (actually free because I had a knackered henry) |
| Lid from a cocktail shaker | 10? | (actually free because I butchered one we already had) |
| Aluminium tape (heat proof to 250c) | 5.49 | amazon |
| Voltage dimmer | 6.99 | amazon |
–
(amazon links are just basic links, not affiliate. I don’t get any money from these)
Details
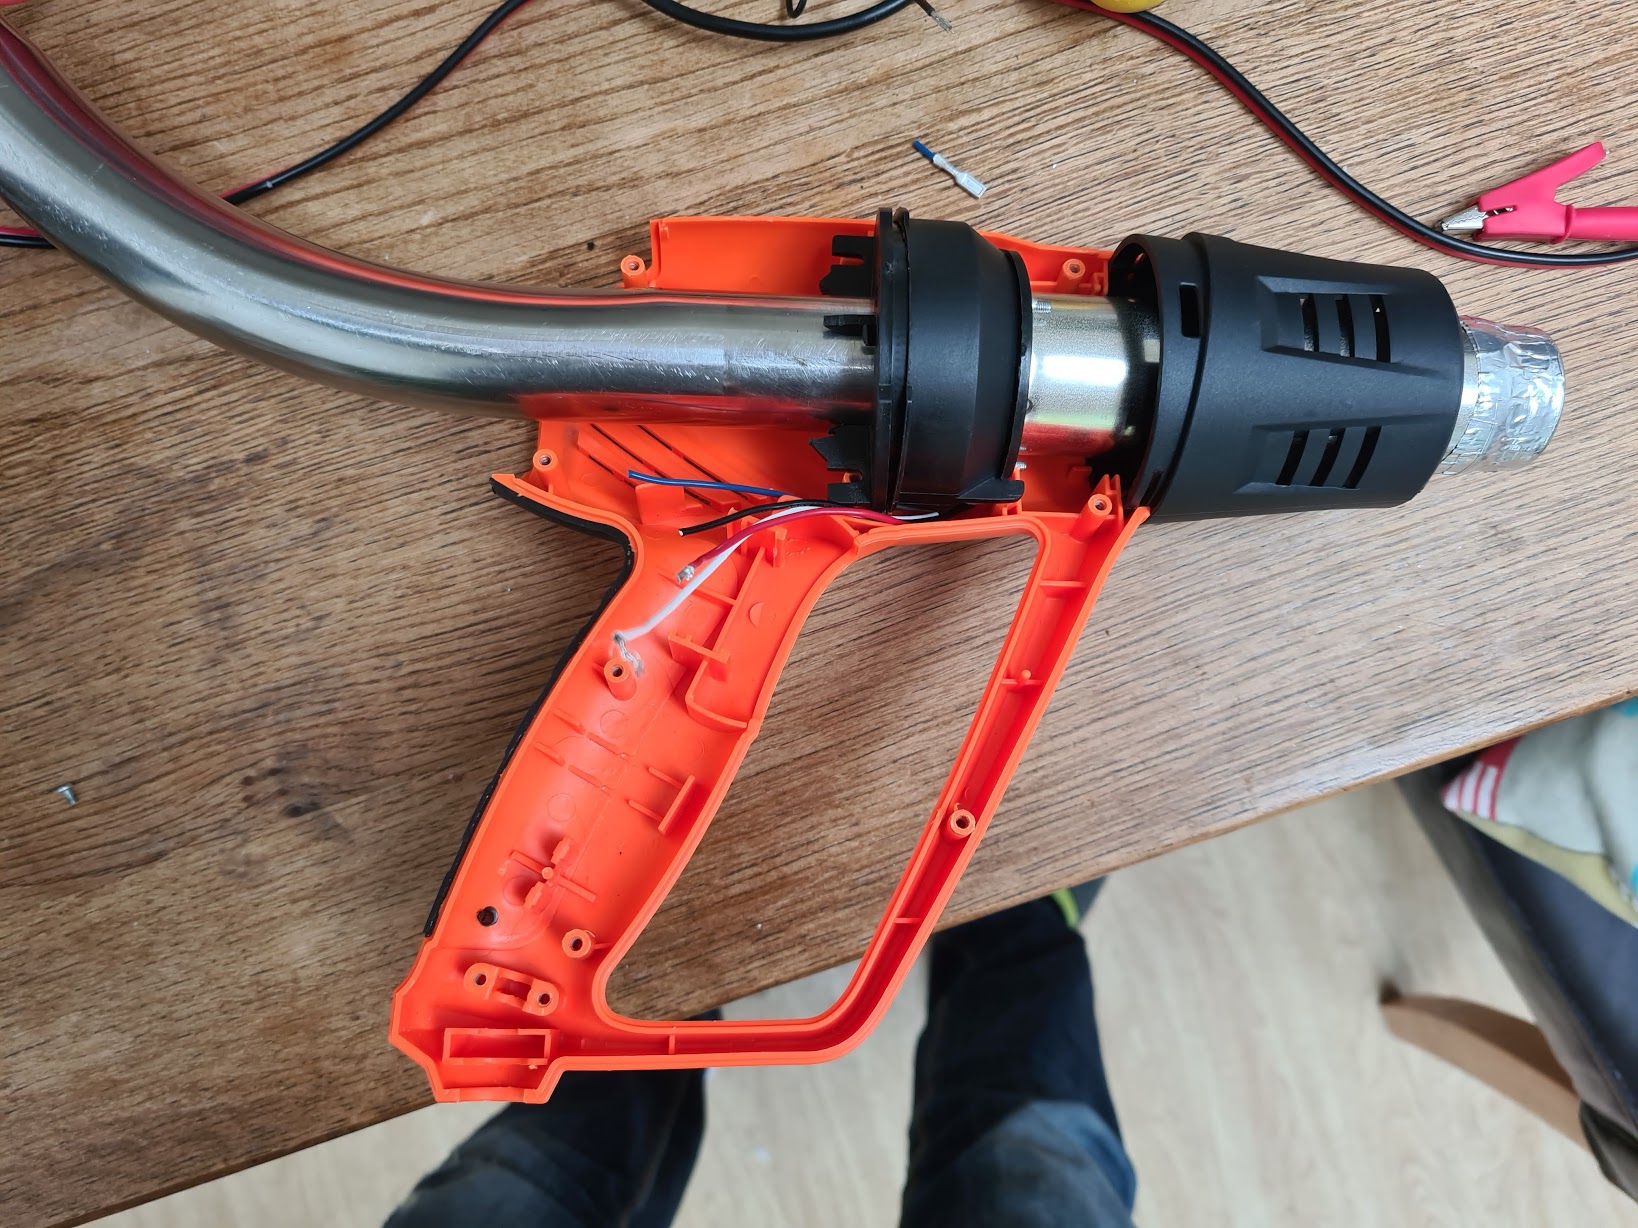
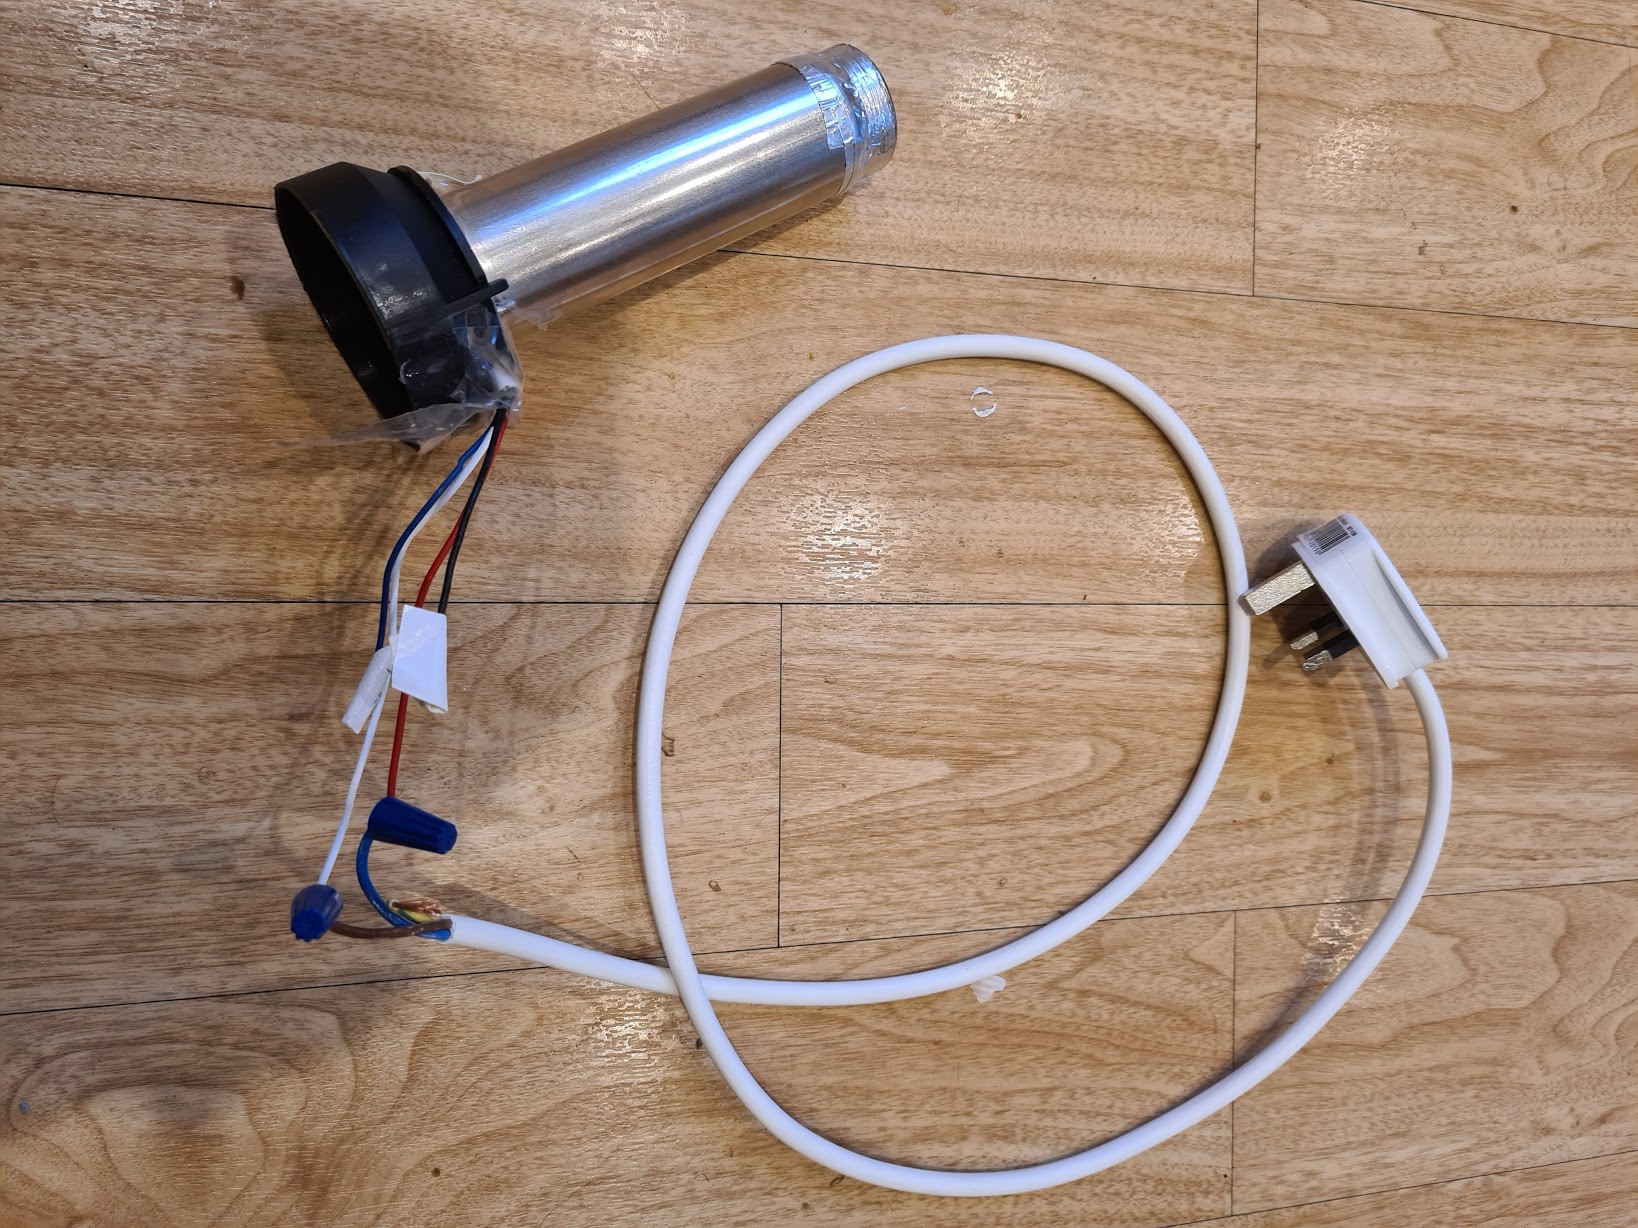
Vacuum blower + Heatgun
I bought the heatgun first and then put everything else together around that. Unfortunately the fan in the heatgun isn’t powerful enough to loft beans on its own so I got the vacuum blower.
(I got that specific blower model because I read that somebody in the homeroasters forum had already tried it and said it was plenty powerful. A cheaper model might be just as good)
I unscrewed the heatgun and cut the fan out. I found that the hole left in the bottom was a perfect fit for a henry vacuum hose.

Although the pictures at the top of the post show a clamp stand being used to hold the thing together, the heatgun housing will actually stand up by itself. For a short while I was roasting using that with the roasting chamber balanced on top.
Heating element
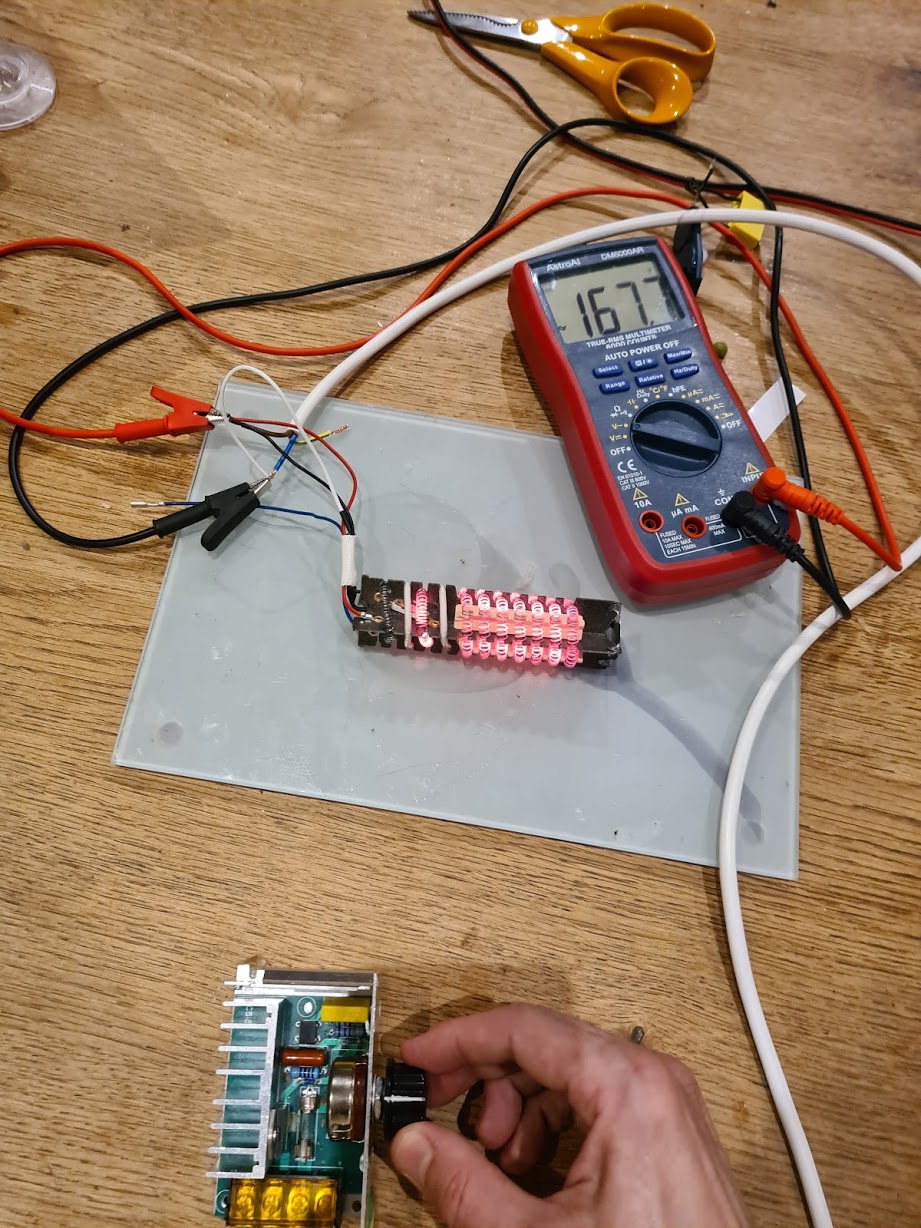
I used a multimeter and the voltage controller to figure out which heater wires to plug the power into. (It’s the red and white wire!)
Heatgun barrel back together again:
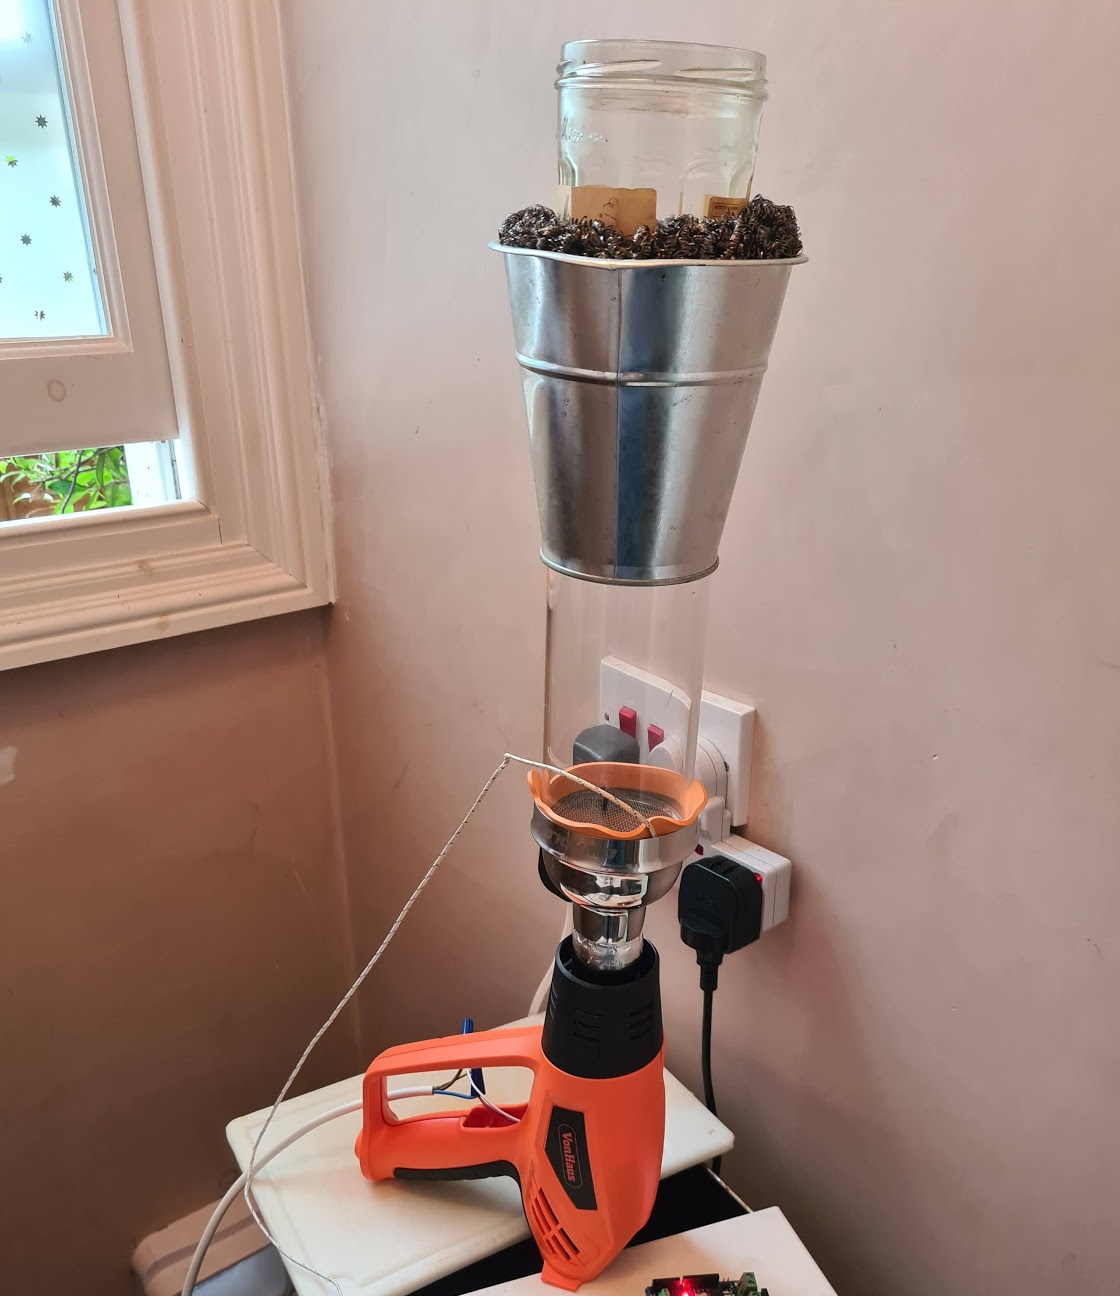
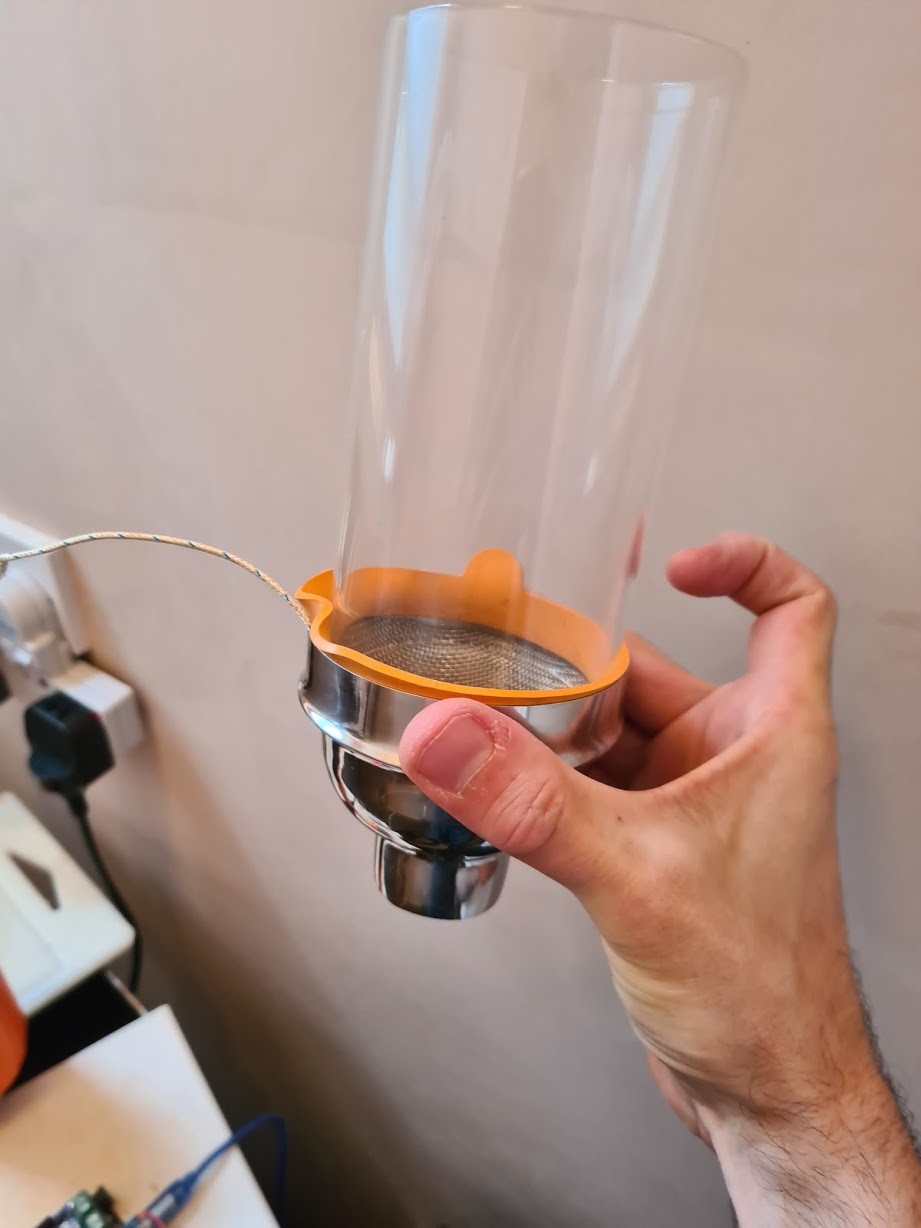
Roasting chamber
The roasting chamber is a cocktail shaker lid + some wire mesh + glass candle holder tube. The original holes in the bottom of the cocktail shaker lid wouldn’t let enough airflow through so I cut them out completely. I pushed in a circle of wire mesh.
The borosilicate glass tube doesn’t fit at all snugy into the cocktail lid, so I used a rubber seal from a kilner jar to wedge it in a bit. I was a bit worried about the the rubber seal not being heat proof, but it doesn’t seem to matter.
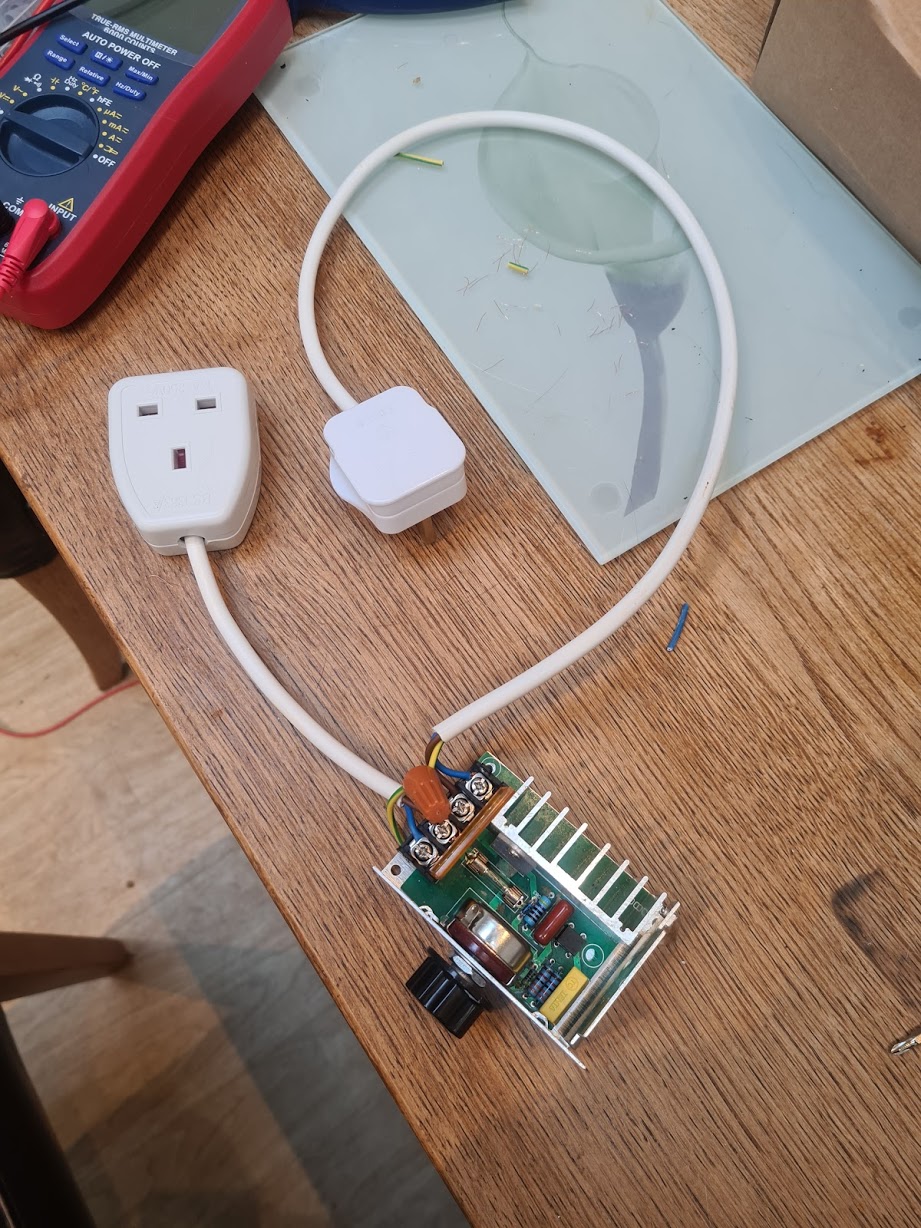
Voltage Dimmer / Controller
For manual control I used the same cheap AC voltage dimmer I had previous used for manually controlling the popcorn maker heater. This thing has been so useful I put a plug socket on it to make it easier to connect/disconnect, and earthed the casing.
Thoughts and some stuff I missed
-
The blower is plenty powerful but is a bit loud if I’m honest. Ideally I’d like to figure out a way to make it quieter. Maybe at some point I’ll experiment with an EDF fan or something.
-
I’ve ordered a longer glass chamber (254mm). I think the 75mm width I chose was good, but it would be nice to have the option of roasting a much larger batch - e.g. half kilo and up. The fan and heating element seem to have lots of room for growth.
-
Although I didn’t mention it here, I now have it hooked up to Artisan via an arduino, theromocouple breakout and ssr. Getting a pid driven ROR curve smooth is a mission in itself so will hopefully write some more about this soon
-
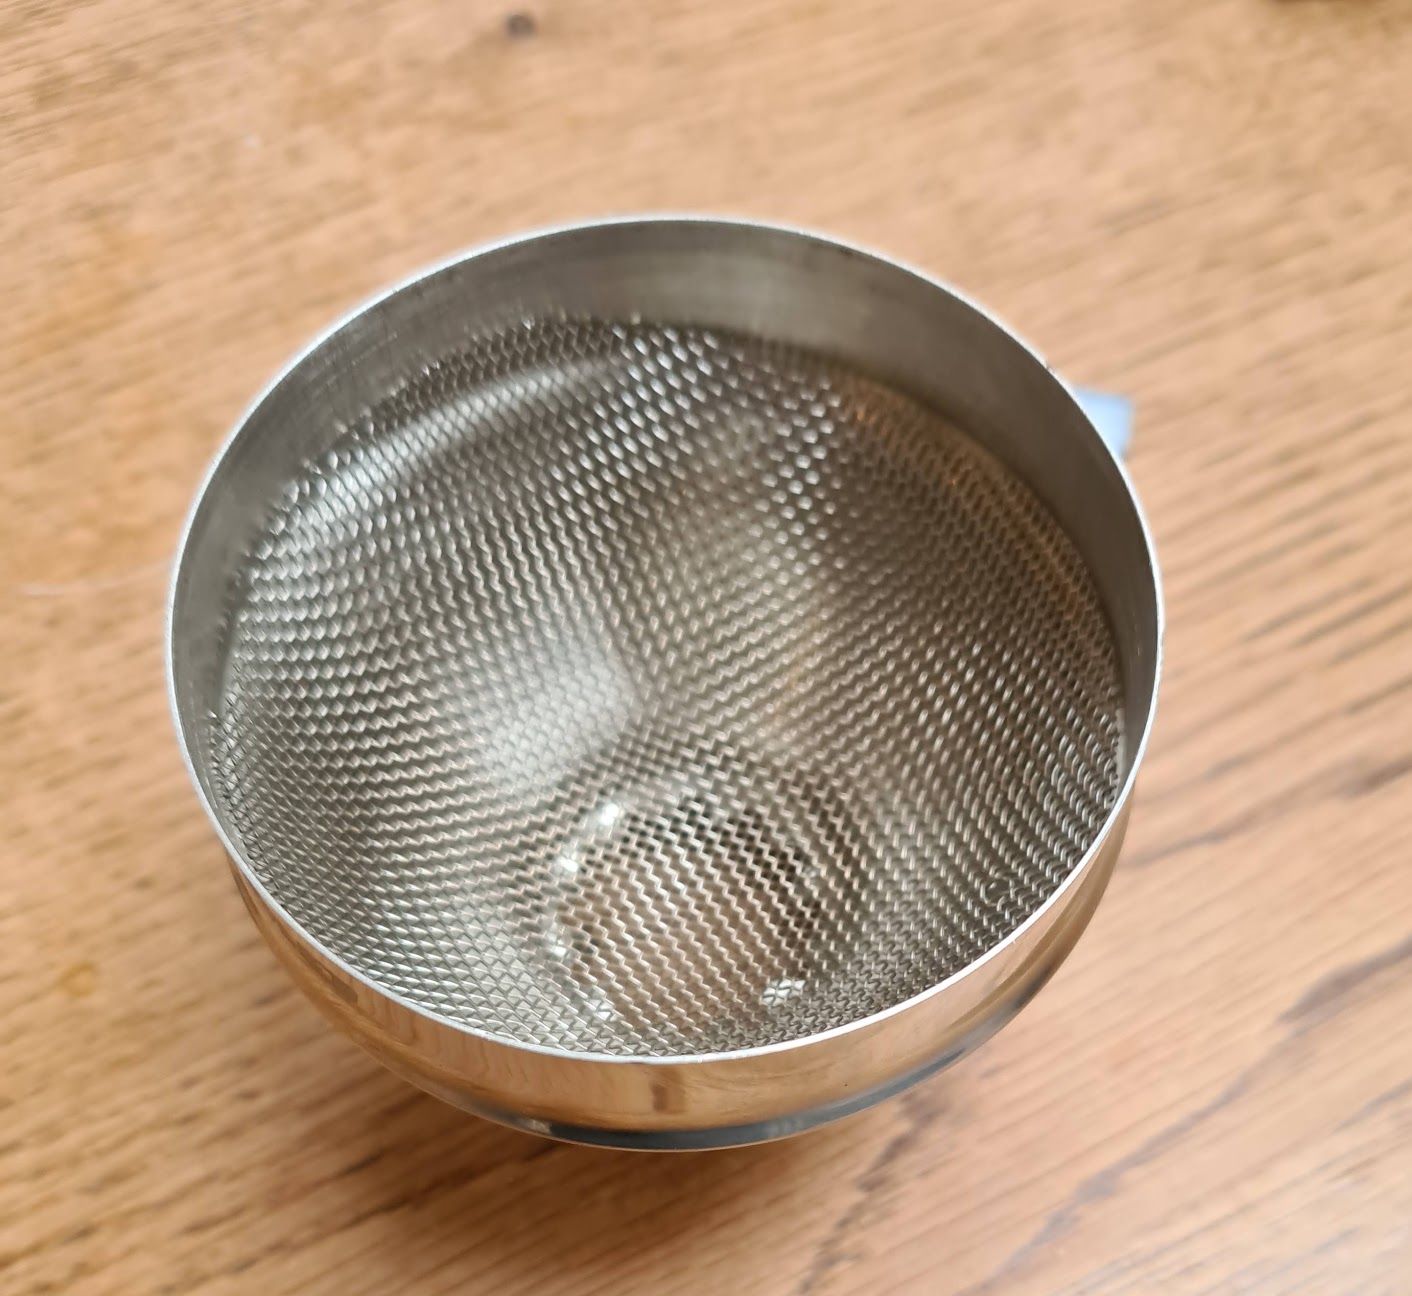
I also haven’t written here about the chaff collector. It turns out stainless steel scourers make a really good filter. I ought to post some pictures of that. *Update: posted here *