Building a 1/2 lb air coffee roaster for 50 quid!
This post is about building a bare bones DIY fluid-bed coffee roaster with a decent batch size for around 50 pounds uk (around 50-60 dollars US).
I recently discovered you can find cheap heatguns with variable dialled temperature from sellers on amazon and ebay. The variable heat control really lowers the barrier to DIY roasting because you gain precision without having to resort to electronics and soldering. This lead me to wonder just how cheaply you could put together an air roaster based on one of these.
The entry level for diy air roasters has traditionally been a popcorn maker (I previously built one here). Unfortunately the coffee capacity of a popcorn maker is confined to around 85g-100g because of the limited fan motor and element. The modifications are also quite involved if you want individual control of the heat and fan speed.
Instead here I’m following the simpler heatgun + air blower route. To keep costs as low as possible I built the rest of the roaster prototype out of tin cans, cardboard and tape. Here’s my prototype roaster in action. If you listen you can clearly hear first crack:
Building a coffee roaster out of bits has some nice advantages over buying one:
- The initial cost is low
- There’s lots of scope for cheap incremental upgrades: temperature probes, glass chamber, venting, automation
- Maintenence is straightforward: the individual parts are cheap to replace if something breaks or wears out
- It’s a fun hobby
Also fluid bed style roasters have a couple of nice benefits for the home user:
- The air stream forces chaff and smoke out through the top, which makes it straightforward to filter and vent smoke out a window if you’re roasting inside
- You can see the beans up close, hear first crack and get a good feel for how the stages of the roast progress
- You can easily take samples during the roast (e.g. first crack + 30 secs, first crack + 1 min etc.)
- Cooling is built in!: you can cut the power to the heater and turn the blower fan up to rapidly cool the beans
Before I go any further there is a WARNING + DISCLAIMER:
This post is here for inspiration and ideas, but you are solely responsible for your own actions and safety. The project involves mains electricity and significant heating power so if you do try something like this please be really really careful. Spend time understanding the significant fire and lethal shock risks. Think about what might go wrong and if you are unsure about how to do something safely, stop. Don’t work on your roaster while it is plugged in and never leave it unattended while powered on
Also if you’re going to roast coffee (even with a retail home roaster) with all the chaff and heat that’s involved, you’re going to want these items:
- RCD safety cutoff. E.g. like this power adaptor (some protection against fatal electric shock)
- Multimeter to check earthing
- If you’re roasting indoors: Fire extinguisher for electrical fires (powder type)
These are important general use items that you want in your home, I haven’t included them in the costs.
Now with that said, here are the parts I bought for the roaster:
| component | price (uk) | from |
|---|---|---|
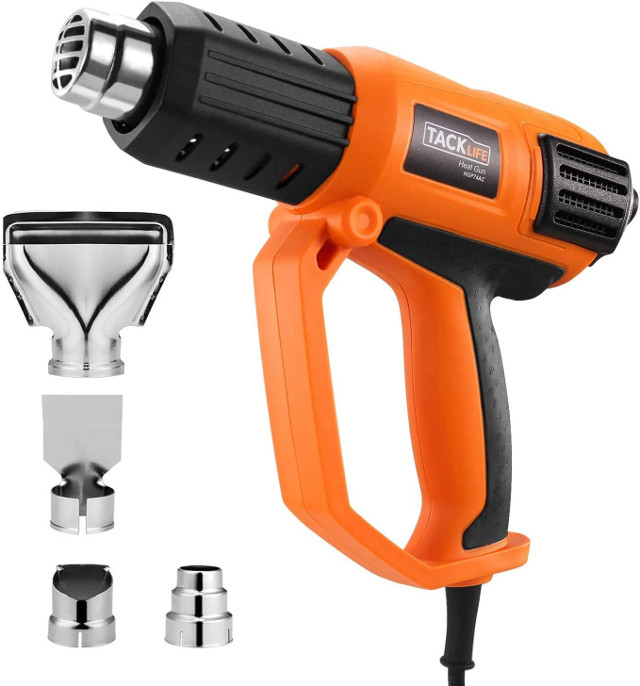
| 2kw heat gun with variable adjust dial | 23.99 | e.g. amazon |
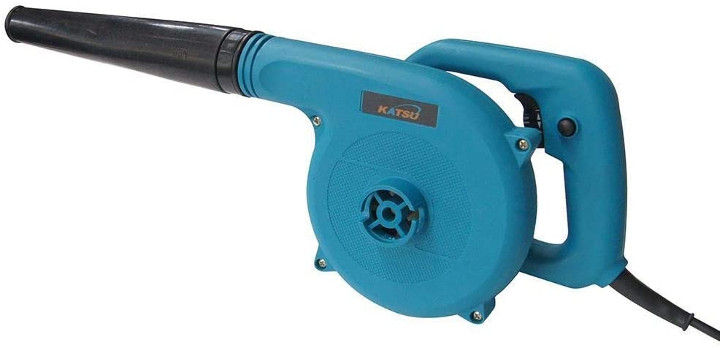
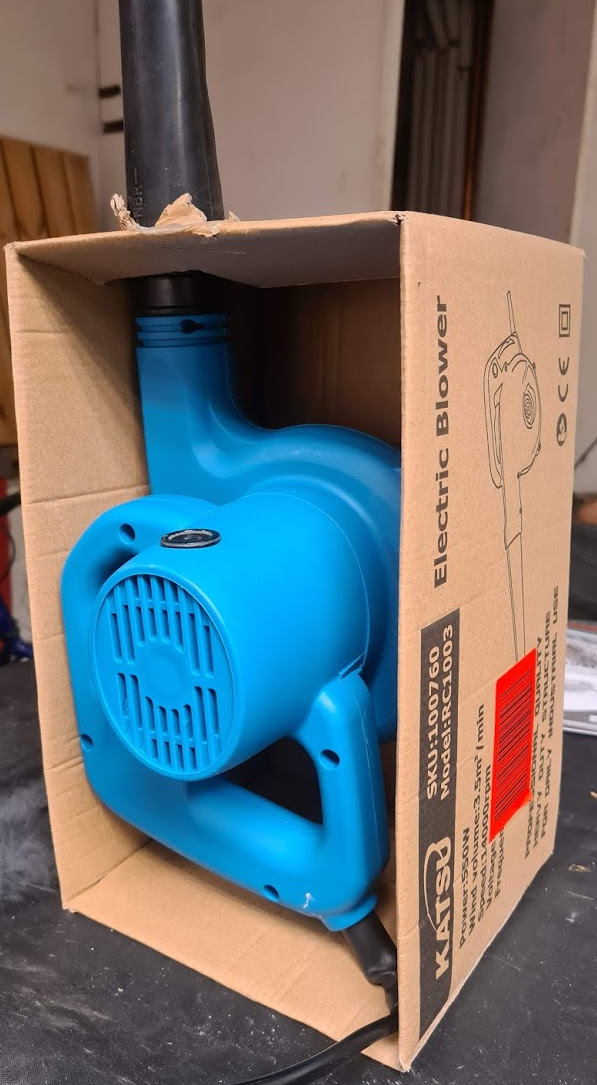
| 500w dust blower with variable dial | 22.99 | e.g. amazon |
N.B. It is very important that both units have a variable adjuster for precision, and not just a switch for low and high. Also it’s worth getting the highest power heatgun you can as I found this is the main limiting factor for the batch size you can roast. (If you do accidently buy a heatgun with a switch you can still use it, but you’ll need to add a variable AC dimmer yourself. e.g. I’ve previously used something like this).
Also I used:
- 3 tin cans
- Some wire mesh (e.g. cut out from a kitchen mesh strainer, or a sheet from a hardware store)
- 2 cardboard boxes (one of which the blower came in)
- Aluminium tape (heat tolerant to something high like 250c)
There were 3 main steps to build the prototype:
1: Remove the underpowered blower motor from the heatgun
A heatgun already has an internal blower motor, but it is too underpowered to loft green coffee beans. After testing the heatgun to make sure it worked, I set about removing the underpowered motor to leave a hole in the back so that the more powerful dust blower nozzle could be poked into it. Luckily a 500w dust blower is so powerful that it doesn’t need a tight fit at all to loft coffee beans, so just loosely pushing it in is enough. Here’s some pictures of the process:
Heatgun with the front sleve and some of the screws removed:
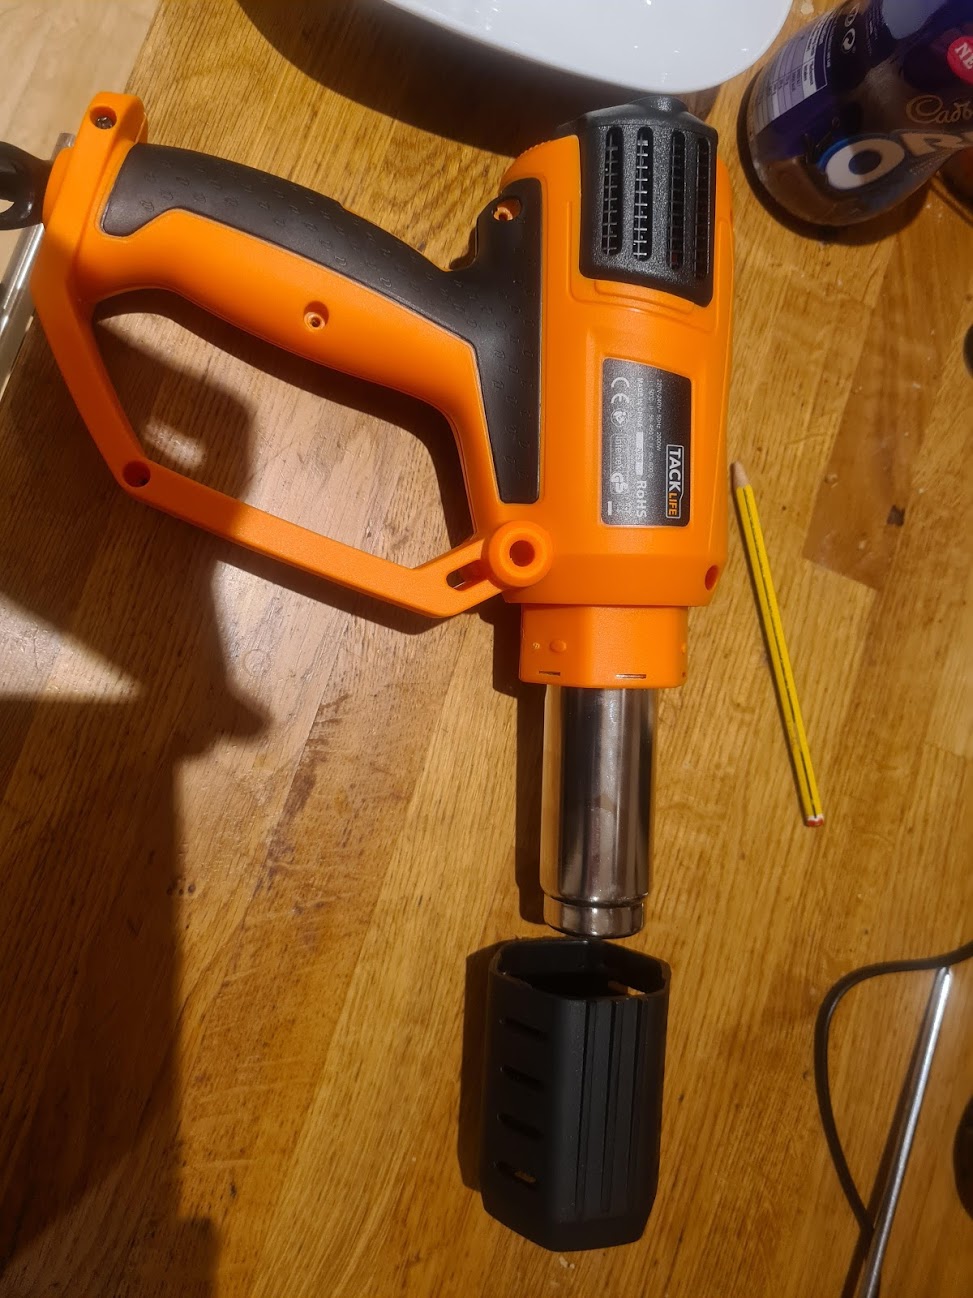
Here’s the heatgun all opened up. You can see the (underpowered) DC fan motor, the barrel (which contains the heating element) and the black plastic bit at the back which contains the circuit board with components to vary the AC power to the heating element and supply the motor with DC power:
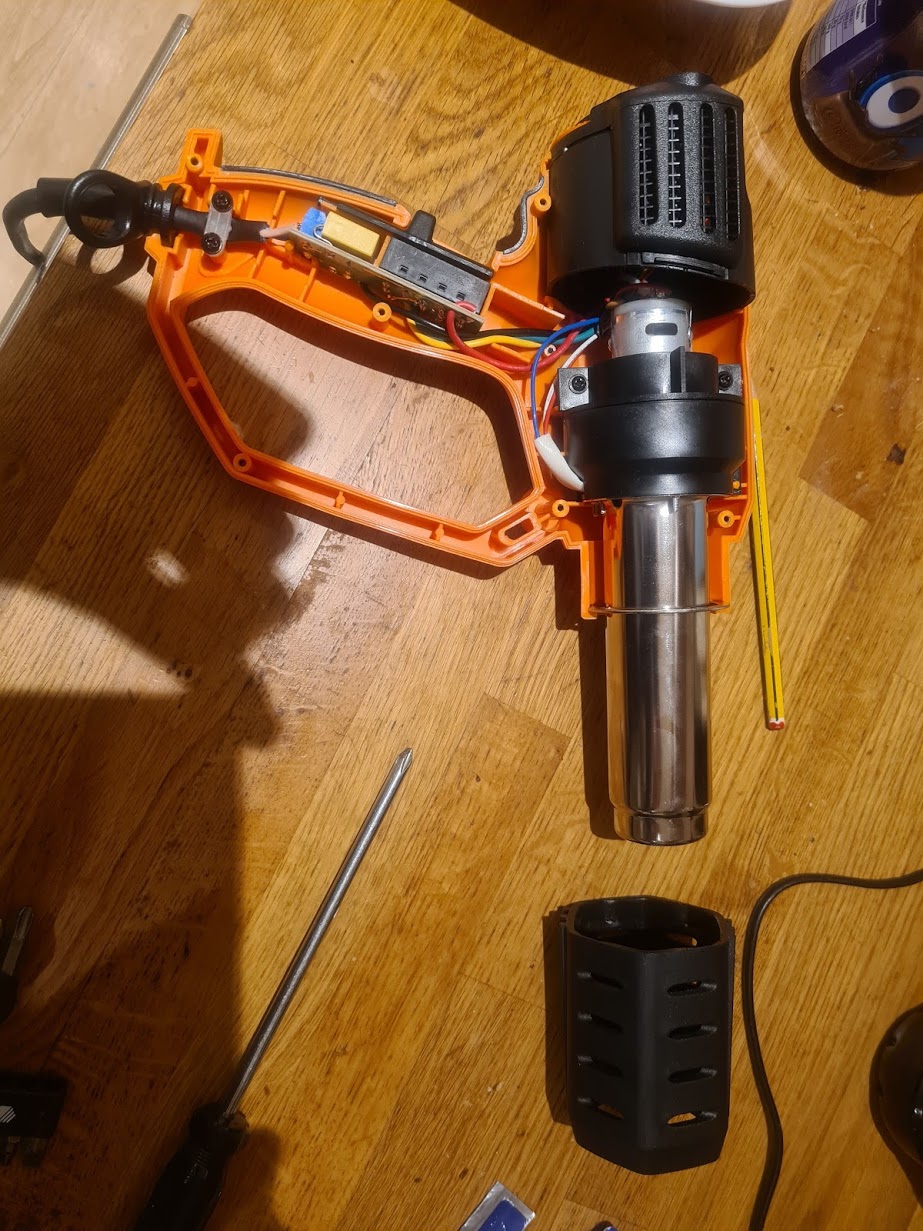
My heatgun had the temperature dial on the back of the unit, which seems quite common. It’s a bit of a pain because we need a hole in the back for the blower nozzle, but also need the dial accessible to vary the temperature while roasting. With the plastic housing off I was able to move the dial enclosure and the motor+fan out and round to the side, and then screw the gun housing back on to hold it in place:
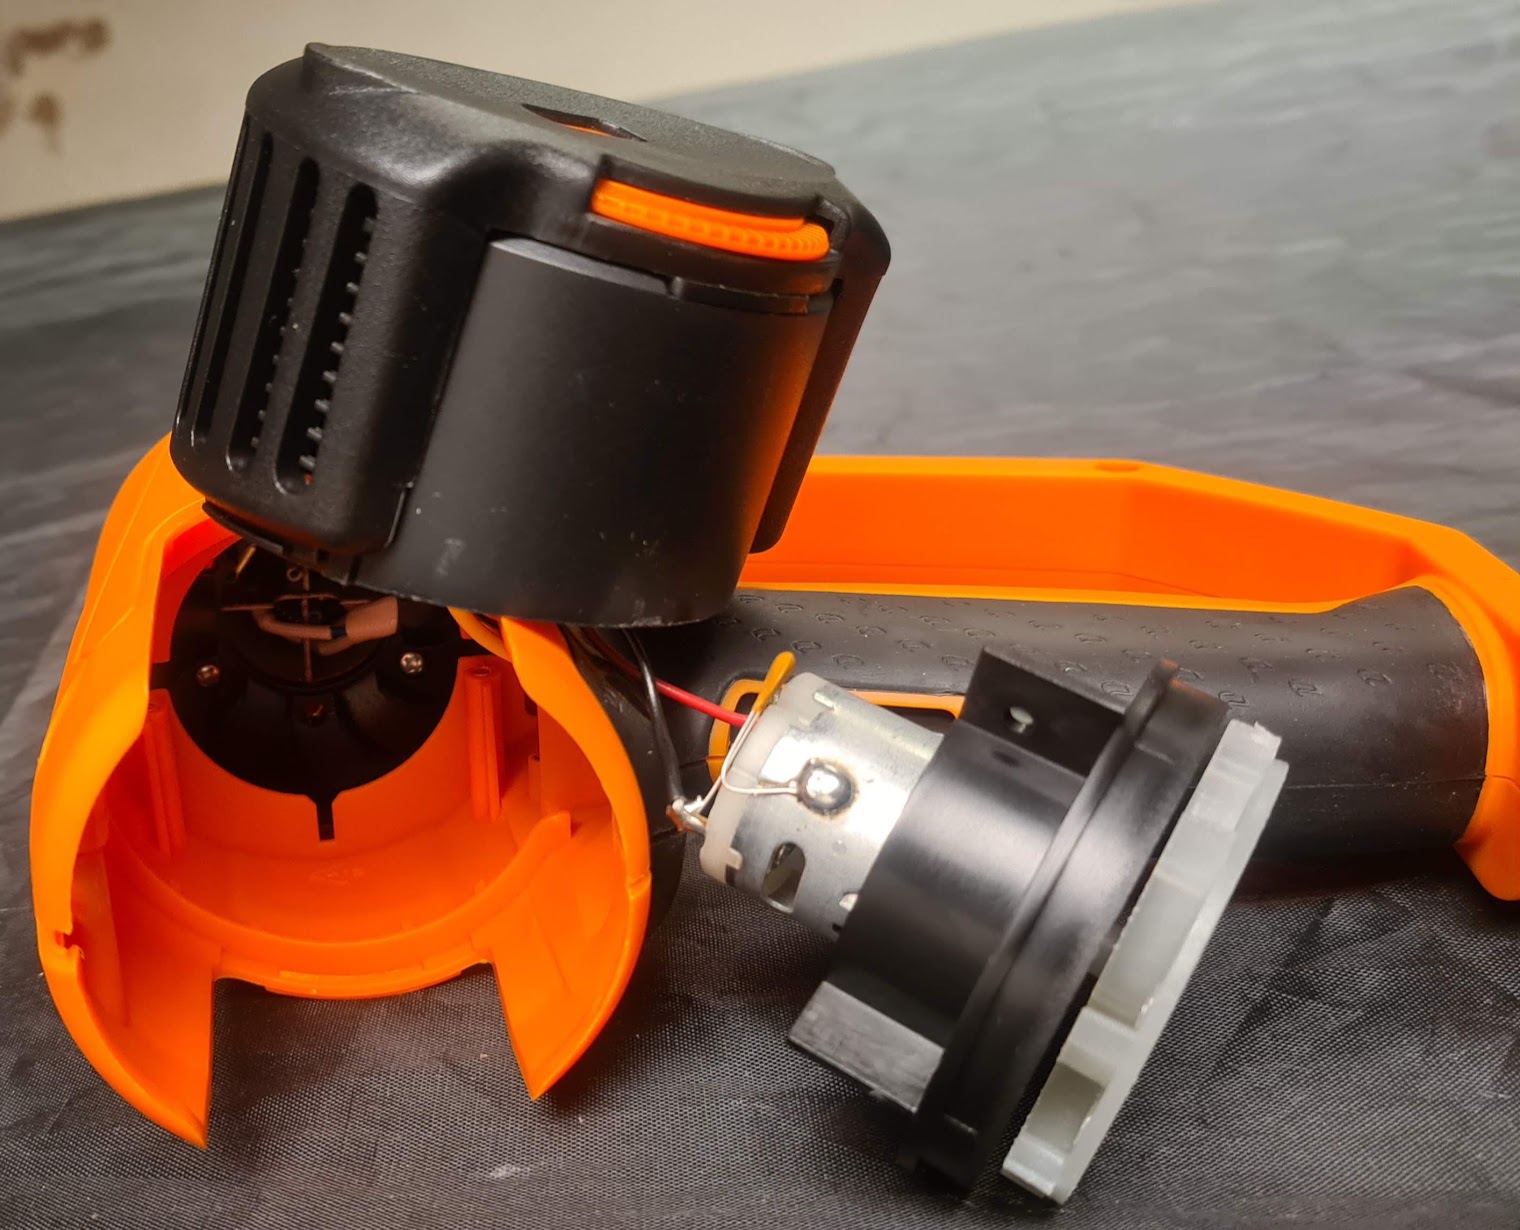
Here is the motor dangling off the side. I cut it off at the black and red wires and then connected them together with a screw terminal (next 2 pics). The wires need to be connected for the circuit to be complete otherwise the heatgun won’t work at all:
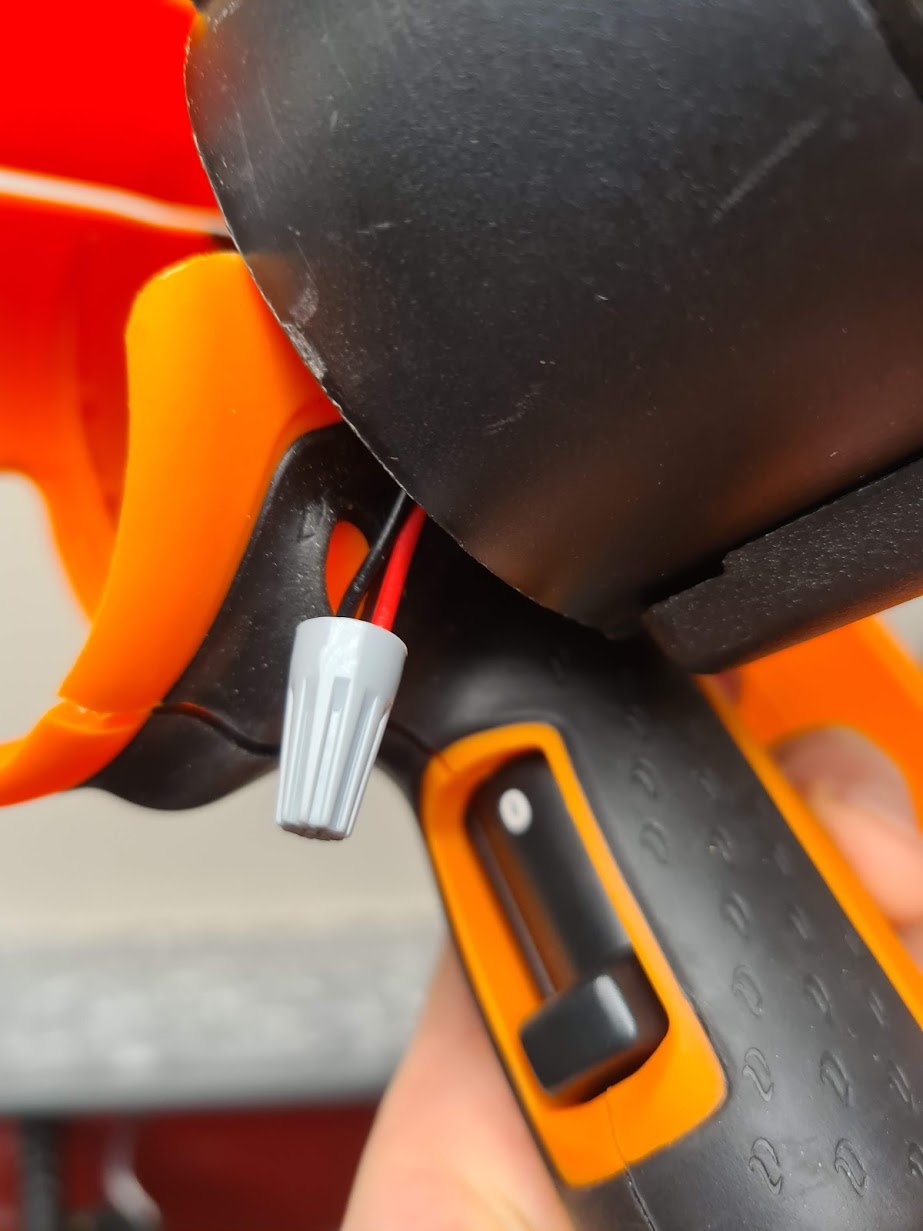
(Instead of a screw terminal I could have twisted the wires together and taped them with electrical insulation tape)
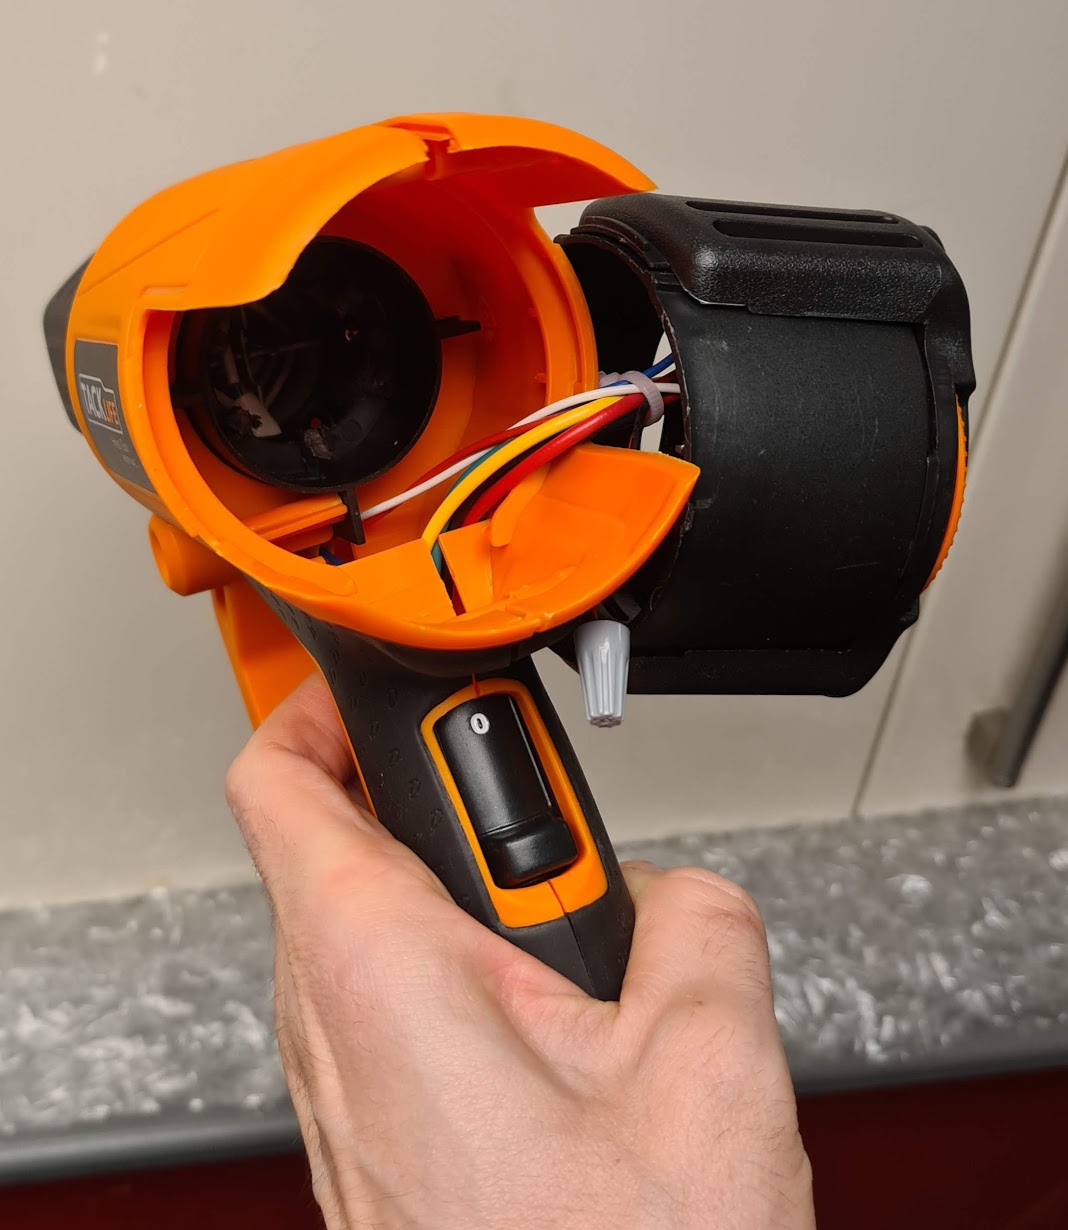
The hole in the back of the heatgun:
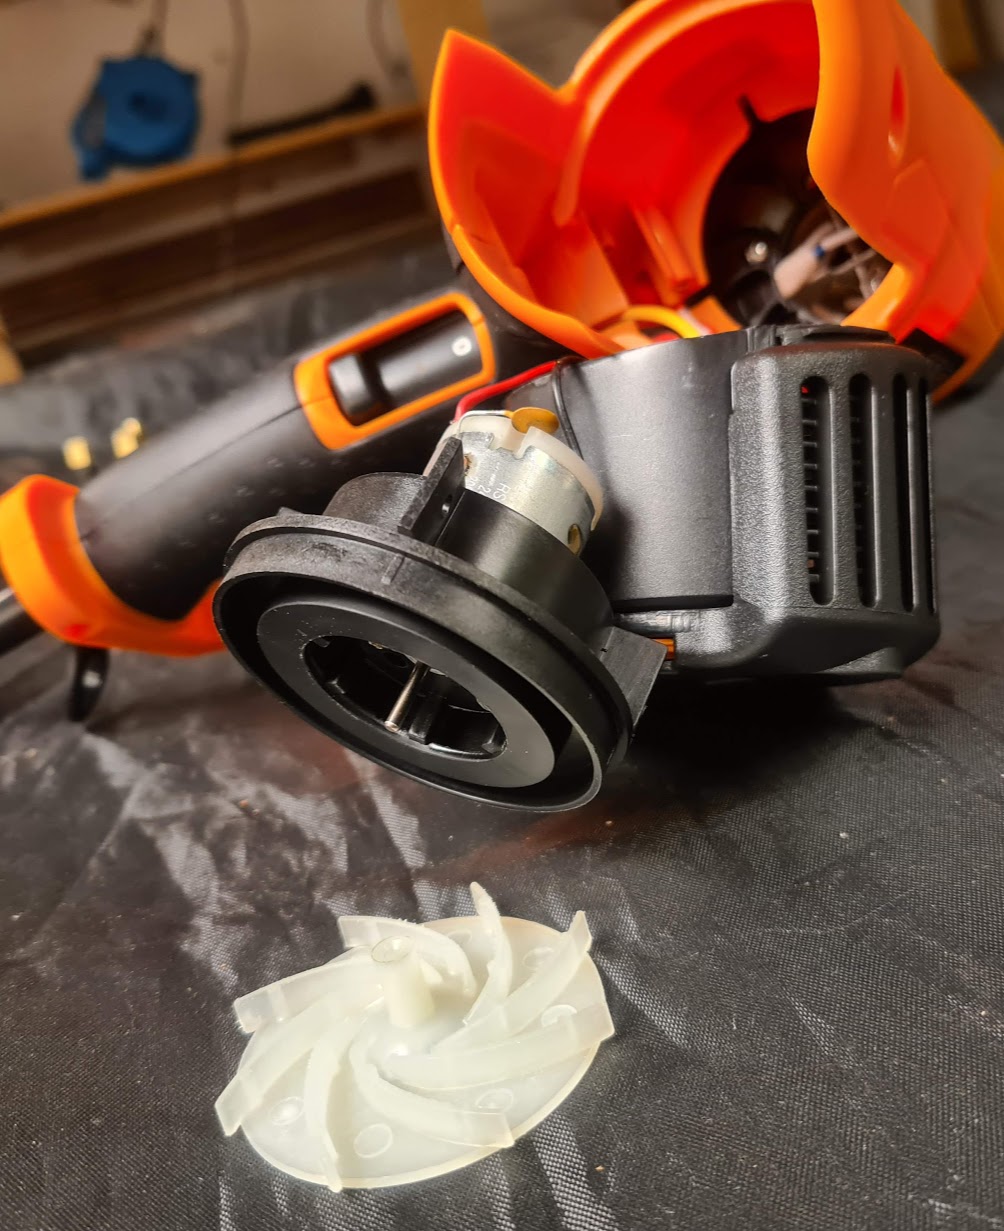
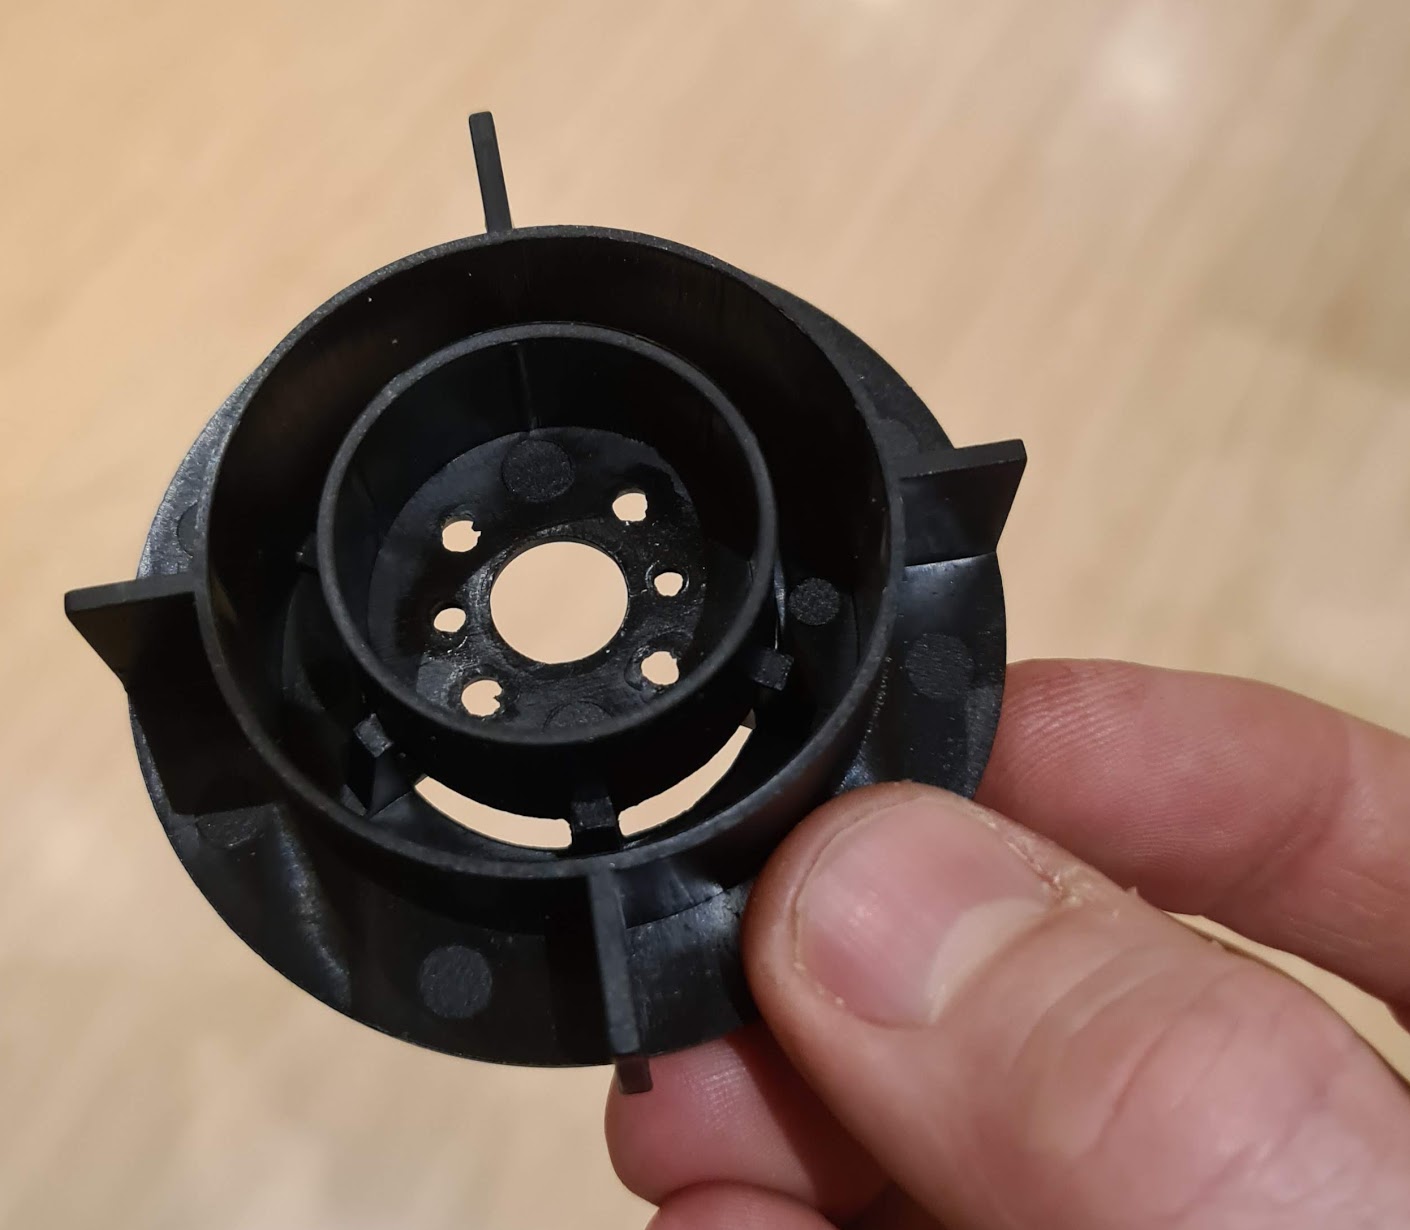
Below is the piece of motor housing that held the motor on. It can be useful to have a tight fitting piece for use as a shim to help seat the blower nozzle and get a tighter fit. It wasn’t strictly necessary - just having the gun sat loosely on the powerful airstream is enough. However if the nozzle is tight fitting you can run the blower on a lower setting and use less electricity:
The final heatgun unit:
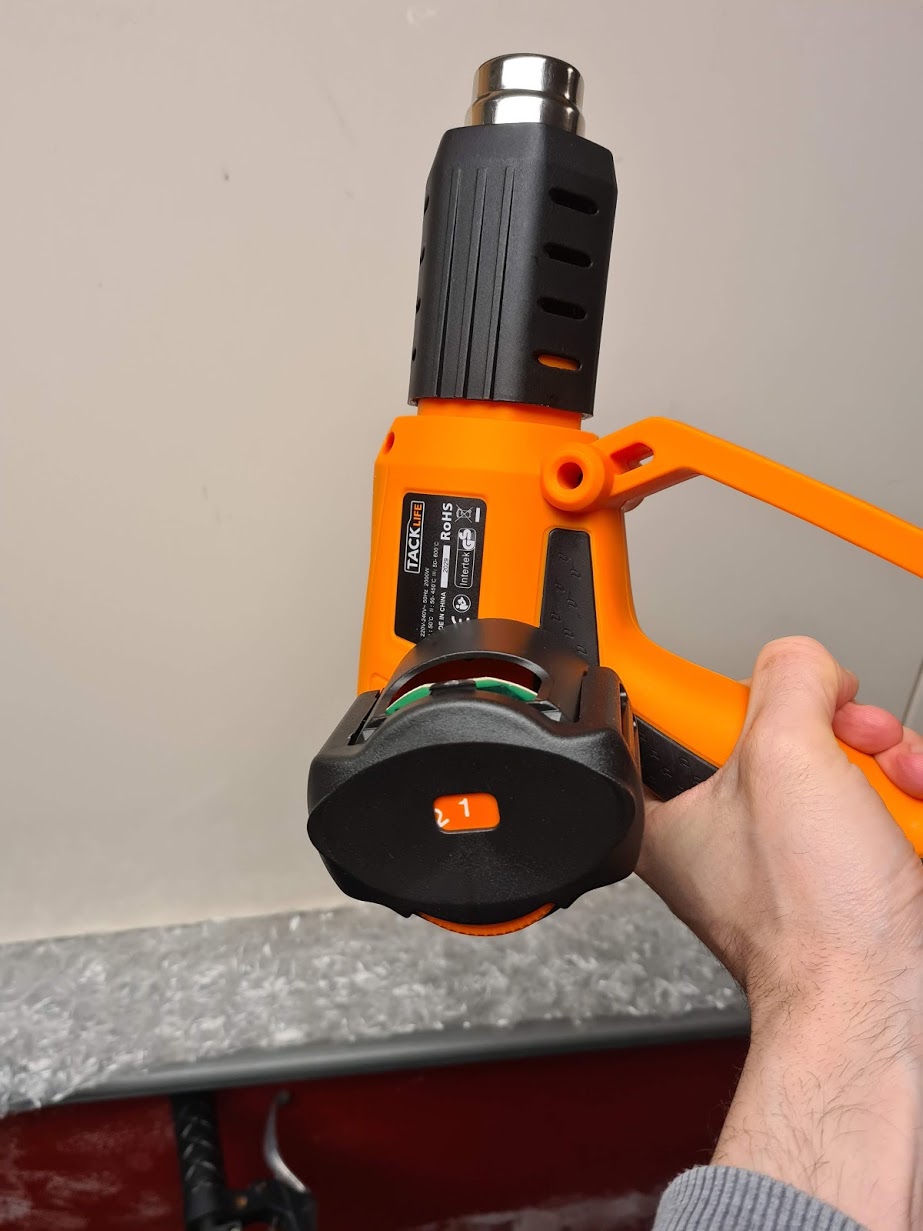
N.B. Don’t plug it in!!! Turning on the heatgun without air running through it will melt the heat element in seconds.
2: Build the roasting chamber
An air roasting chamber needs to (1) attach to the air stream nozzle and (2) hold the coffee beans and keep them circulating through the hot airflow.
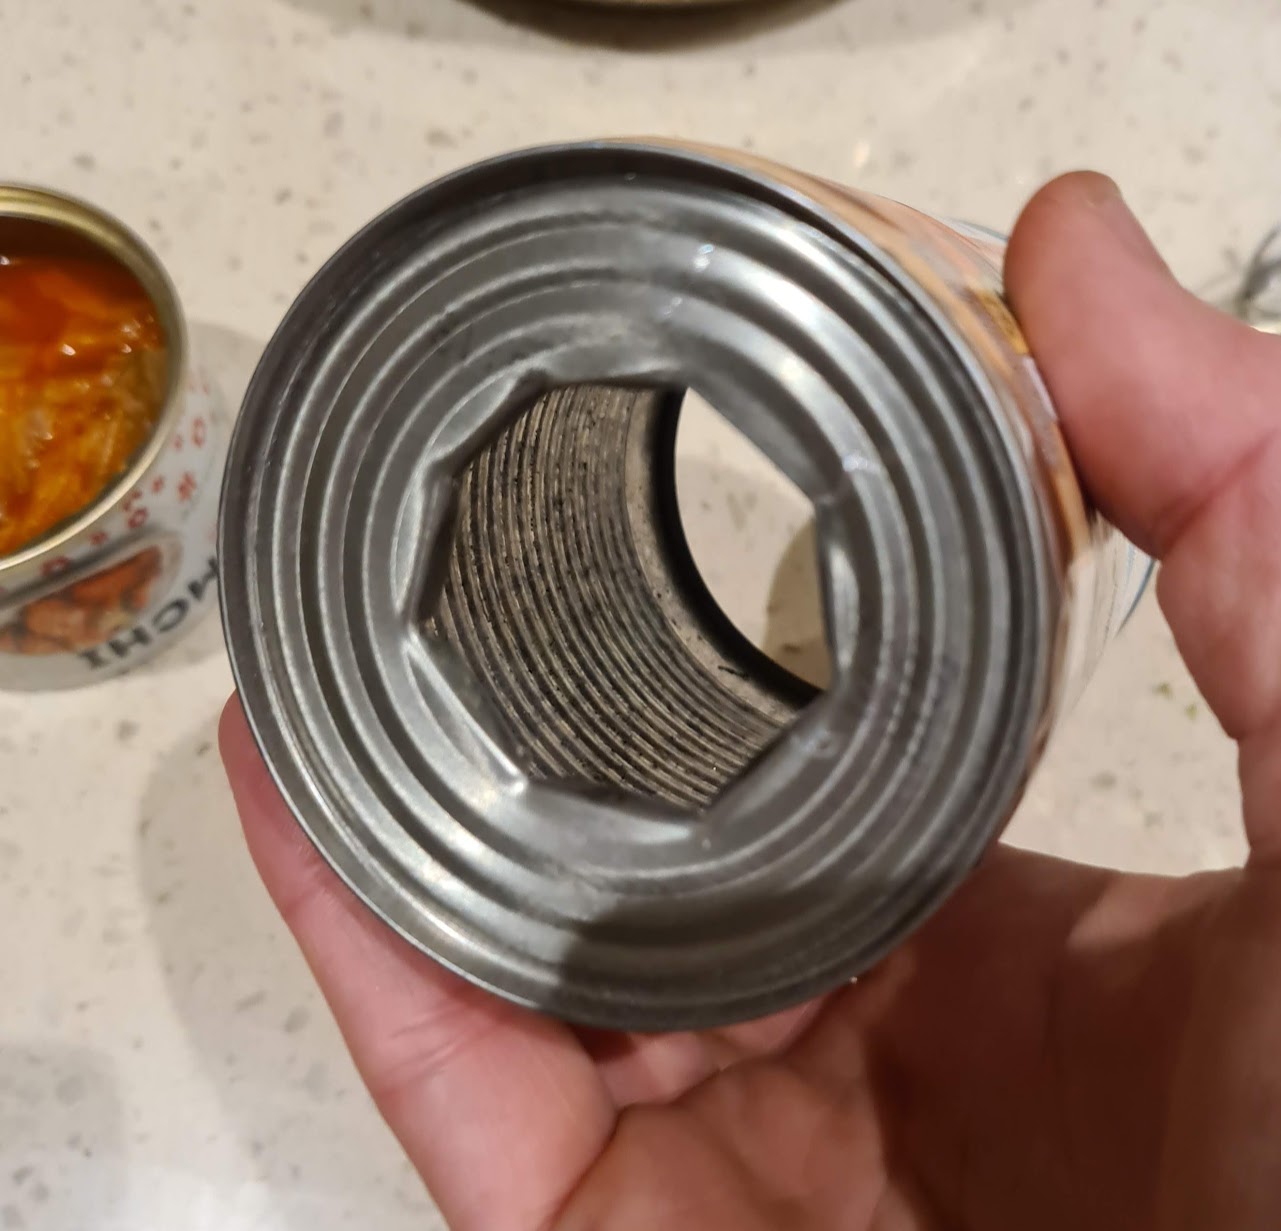
The first stage involved putting a hole in the base of the tin can so that the heatgun nozzle could poke through. I drilled a hole in the base of the can and then used scissors to cut outwards. I cut some of the metal off and the remaining bits I bent over into the can using a screwdriver. Finally I forced the heatgun nozzle through to create a tightish fit:
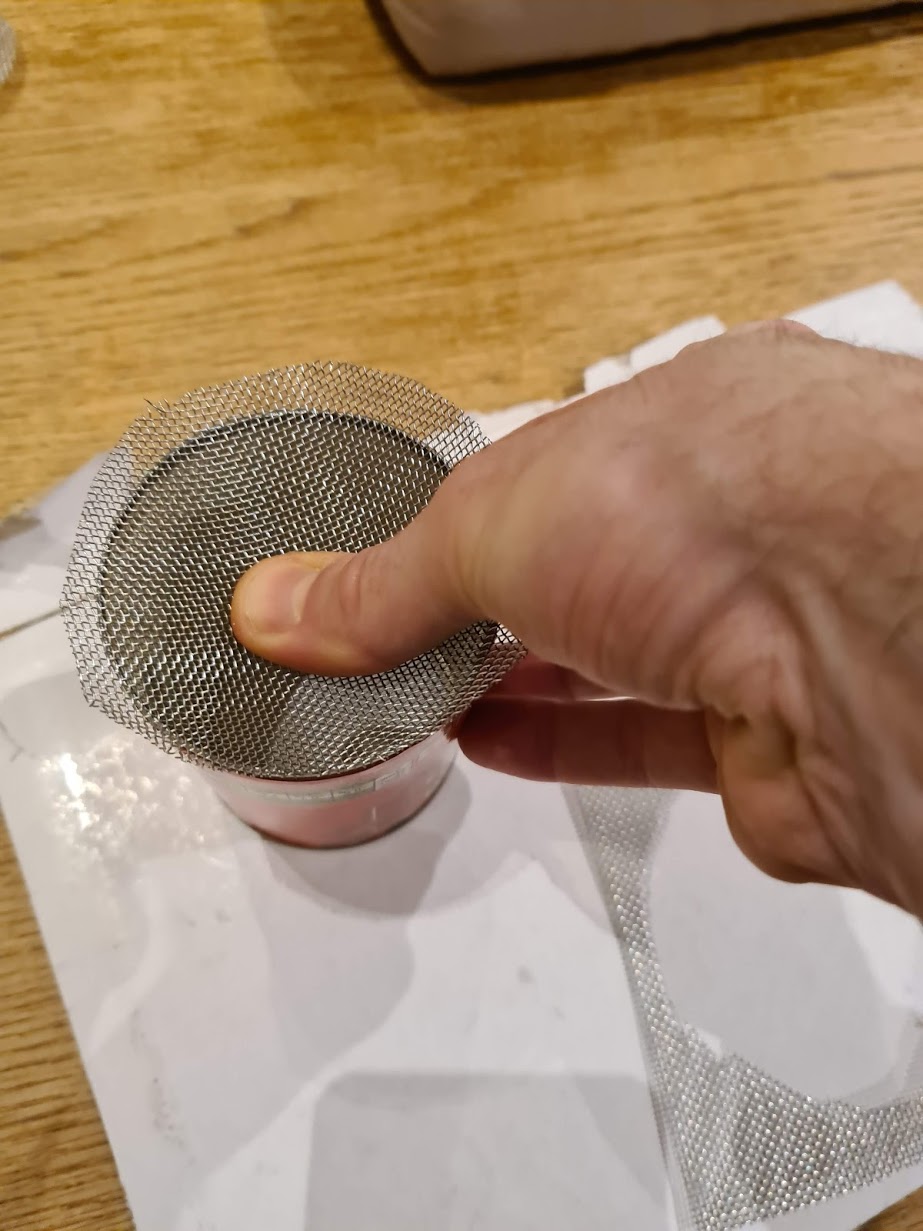
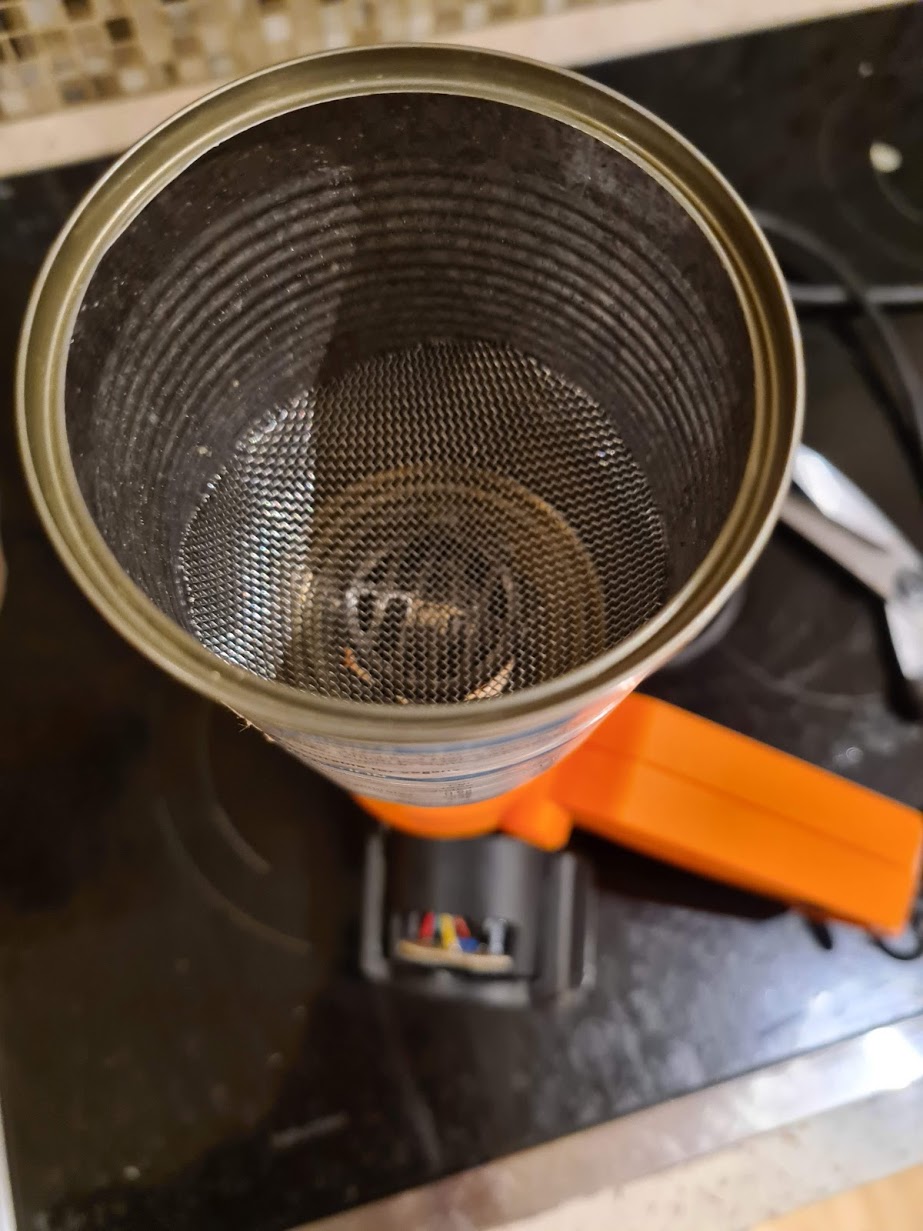
The cheapest, most straightforward way I could find to keep the beans circulating through the airflow was to create a sort of mesh bowl at the bottom of the can. I did this by roughly cutting a circle of mesh wider than the can, and pushing it in and down through the can to the bottom. Pressure holds it in a bowl shape, which is perfect for directing beans into the airflow:
Here’s the roasting chamber attached to the nozzle:
3: Stand it up and make it safe
Unfortunately my blower wasn’t at all designed to be stood upwards so it required jamming really tightly into its cardboard box.
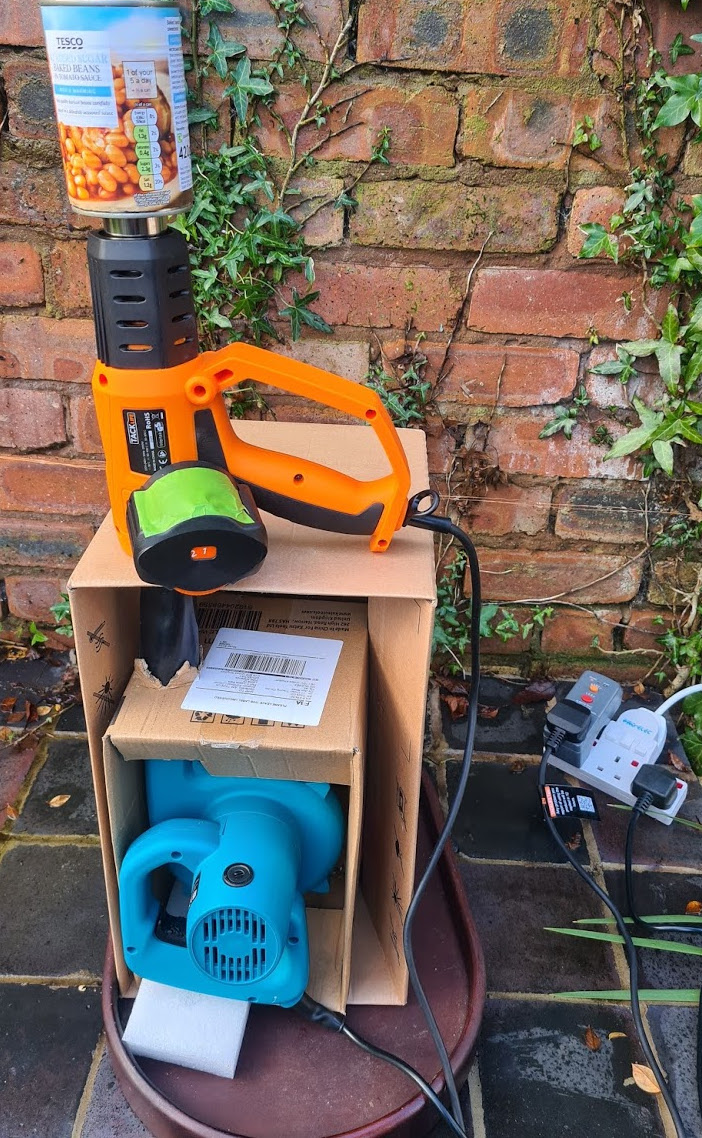
I ended up also packing it in a bit with a polystyrene block. I used two cardboard boxes in all with a hole poked in the top of each to get the whole thing stood up and stable.
I taped up any exposed holes in the heatgun from where I’d moved the dial with insulation tape. I then put the heatgun on the air blower nozzle.
N.B. you need to make sure the unit is very stable. It is worth having a trial run with beans but without turning the heater on just to check. Think about what you would do if the unit fell over. Mentally rehearse turning off the power to everything.
A note about power: You never want to run the heatgun without the air from the blower going through it because the element will melt very quickly. I tried to arrange things so that it is not easy to accidently turn off the fan while the heatgun is going. I locked the fan trigger switch in the on position and then used a 2-way power adaptor to turn both heater and fan on and off.
Roasting
I tend to put the beans in with the fan on low, and then turn it up until they circulate nicely:
Once they’re moving well I turn on the heater and slowly turn up the temperature.
It is not strictly necessary, but a stopwatch and some sort of temperature probe that goes above 220c is nice if you have them. If you don’t that’s also fine, plenty of entry-level fluid bed roasters come without temperature sensors.
Note that a temperature probe doesn’t need to be buried in the bean mass to track the roast - just measuring the exhaust temperature is good enough to track the roast repeatably. (IIRC the Ikawa professional sample roaster uses exhaust heat to control the roast). For my fluid bed roasters I tend to aim for first crack somewhere between 6-8 minutes, which is usually around 200-210c. (Here’s the first crack video from before):
And here’s me switching off the heater at the end of the roast but leaving the fan to quickly cool the beans.
I tend to let them get down to around 40c and then tip them out into a tray
Here are the beans from the first roast:

Finally, some upgrades:
A glass roasting chamber
A glass roasting chamber is really nice for keeping an eye on the roast. Pyrex ‘bake-a-round’ tubes seem to be popular on the homeroaster forums, but I’ve never found a cheap one in the uk. Instead I found that ‘open ended candle holders’ are a good source of heat-proof borosilicate glass tubes, (sometimes called hurricane candle holders, I’m not sure why). For example here’s one on amazon currently for 17 quid.
I’ve previously bought 75mm diameter ones mainly because this is the same diameter as a tin-can so you can easily tape extra cans to the top for additional capacity. In my experience you mainly want to see what’s going on at the bottom of the chamber, so if you get a cheaper smallish one then it’s worth trying to put it at the base of the unit.
I found the sides to the glass tube were too slippy to do the ‘push in a mesh bowl’ trick. I’ve had some luck putting aluminium tape on the inside of the glass so the mesh bowl can grip: Here’s a video, with the blower comfortably lofting a 1/2 pound of green coffee beans:
Also note I tried making a base out of a jam jar lid. It turns out that the weight of the glass tube is enough that it can just sit on the jam jar lid when the blower is on and full of beans without any additional fixings (which was unexpected to me!). This would make it trivial to remove the chamber at the end of the roast to decant the beans.
I’m not sure how long the interior tape will hold up to frequent roasting though, I suspect it’ll get dusty with chaff. It might be better to use a half size tin-can for the base of the roast chamber with the mesh bowl in it, and then tape the glass tube to that so you can still peer in to see what’s going on at the base of the roast.
Ducting!
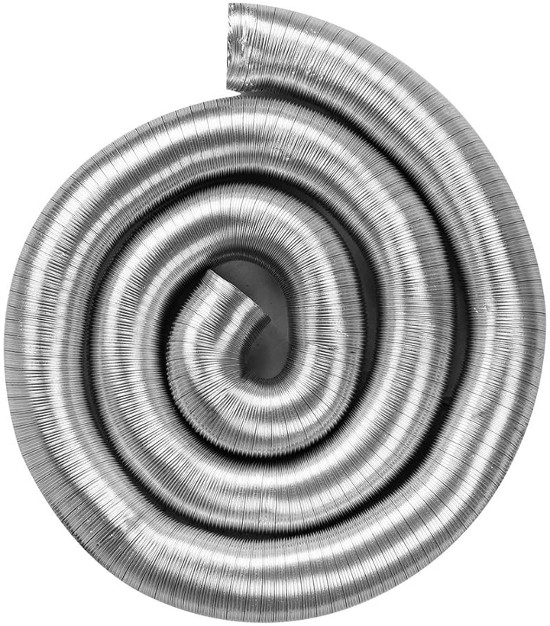
If you’re going to roast indoors then you’ll want a way to vent the smoke and chaff. I’ve been using this aluminum ducting hose which works really well.
I previously also made a chaff collector out of wire wool and tin cans, although these days I tend to just vent the chaff out of the window into the garden. If you don’t have that option, a chaff collector really cleans up the exhaust coming out the top of the unit
Arduino, Artisan, Automation!
My main roaster has an arduino with 3 probes and an SSR to control the heater. I use the excellent free opensource Artisan roast software to control the roast using its software PID. Describing how all this works is a bit involved and this post is already pretty long, so hopefully I’ll write about this in another post in the future.